Tuesday, June 17, 2014

The 63rd Post - How Appropriate - Father's Day 6-15-14

Although I just noticed it - this is the 63rd post on this Blog. Being as its about BAR Motorcar 62, having 62 posts on background and restoration seems appropriate. 

On Father's Day, Dad and I secured permission from our fellow members of the Brooks Preservation Society, operators of the Belfast and Moosehead Lake Railroad to operate between Burnham and Unity Maine. Being members of BPS - we are covered by liability insurance and are part of the organization leasing the track from the State of Maine. 
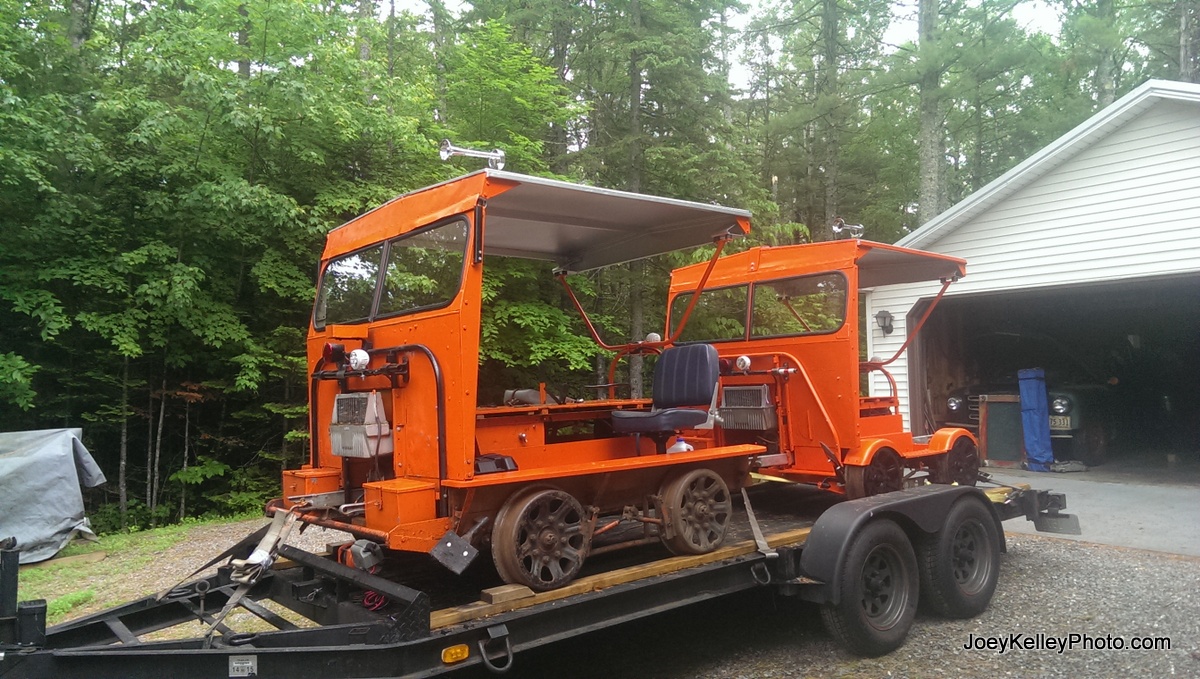
Here we go - Dad's 18 and my 62 car splitting the 16 foot trailer - Morning of 6/15/14

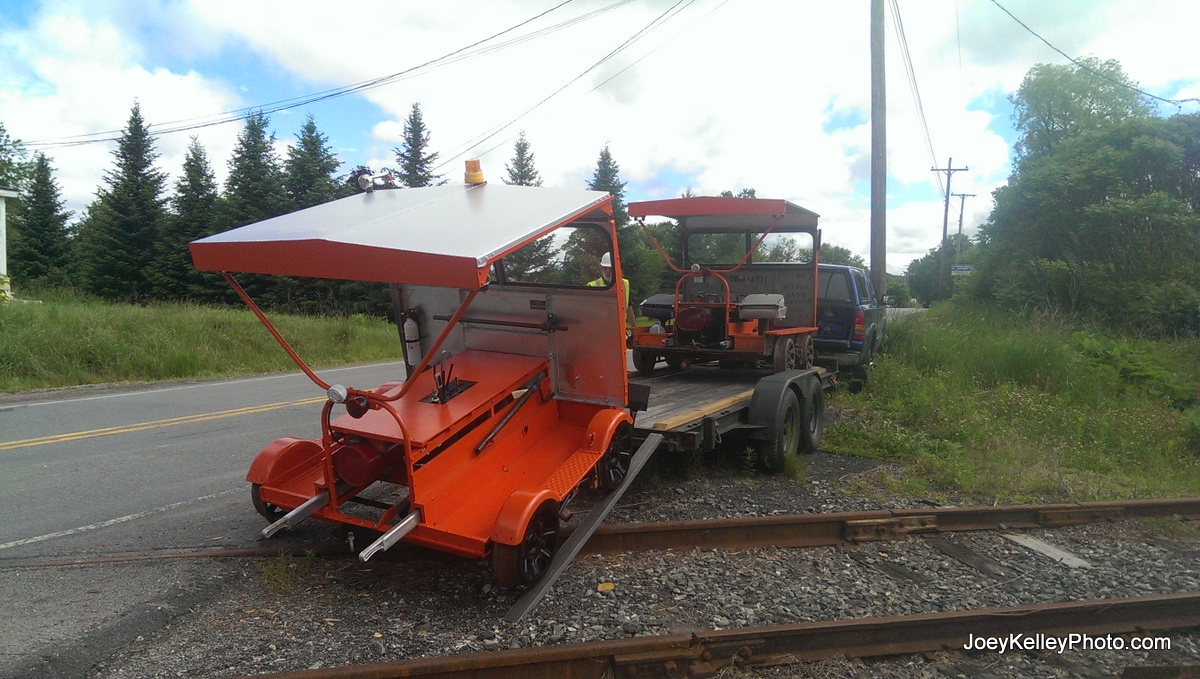
Burnham Junction, Maine - MP 33 of the Belfast and Moosehead Lake Railroad

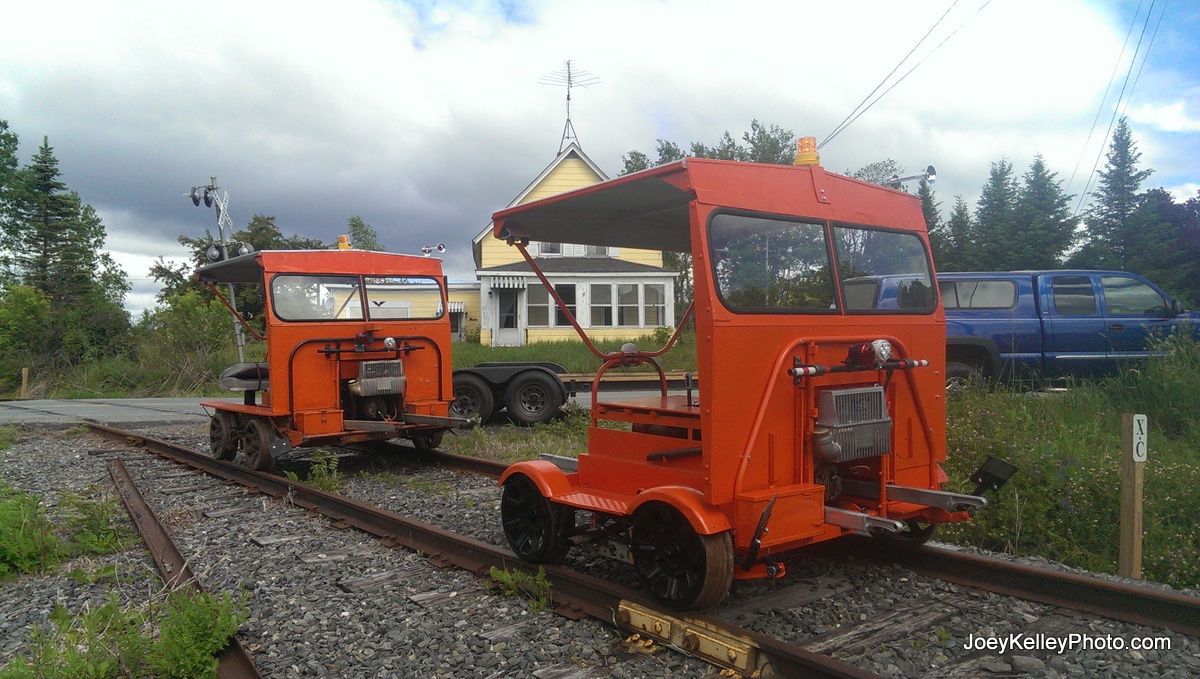
The Two cars - on the rail and preparing to head East. 

While we were in Unity yard, we shot this video:


Neither Dad nor I had any mechanical problems with our cars during the run and it was a great chance to give the cars a shakedown run and test some things. 
See you on the Rail!

Wednesday, June 11, 2014

Wrapping up the details - 6-10-14

As I've mentioned previously, as we get further and further through this restoration, the large projects are mostly done so the the remaining details are what take up the time.
On the 62 side - the windscreen now has glass in it! 

Over on the 18 side - Dad is mounting his horn on the roof

And here it is mounted
We also have completed the wiring on Dad's car - the 18. The horn, ignition, lights, brake lights are all tested and working. 

Back on the 62 - the Horn is now mounted, but we didn't get a chance to finish the wiring. 

The big thing left to do on Dad's is to fire it up - mine all that remains is to wire in the horn!

More to come!

Monday, June 9, 2014

Thar She Blows - 6-8-14

Its been a while since I got a fresh update on this blog and some progress has been made on both the 62 and the 18. 
Dad's been busy picking away at projects big and small. One large project that had to be addressed was the rear wheel wobble on the crank side. Thanks to Dad's friend Jim and some serious machining skill and knowledge, the crank side wheel is now without a wobble. Dad installed the brake switches on both cars and adjusted and tested the switches.In the process, he found that there was no brake lever return spring on the 18 - there is now!
We also were told that we needed to have a horn permanently mounted on each car for regulatory requirements on one railroad that we intend to operate. So much for my plan to use sports horns!
Here is the 9" air horn style electric horn that is now mounted on the operators side of the 62.
With the exception of wiring in the horn and attaching the button to the control panel, the only remaining task to put the 62 on the rail is to have the glass installed in the windscreen. 

On the 18 front - Dad's custom bracket shop has been opened again and as you can see the the tail light is mounted on the front of 18. The headlight is also mounted, just not shown.

Meanwhile on the back, as you can see the lights are mounted.

All four lights on the 18 were wired, tested and verified to work. The brake light circuit was also tested and verified to work. 
Dad's horn also needs to be mounted, along with the horn button and a few other wiring tag ends need to be tied up. Other than that - all we need to do is test fire the 18 and we'll have two operational Bangor and Aroostook Motorcars. 

Friday, May 30, 2014

Putting the Brakes on - 5-28-14

A while back, when starting to put the brakes back on, I discovered that I didn't have them all. Missing one wheels worth of brake parts, I put in an order almost immediately to Dean at Fredericksburg Shops. Once the new shoe, hangers, spring arm and block arrived, Dad put them together and I went over to help with assembly.
Here is the Crank side, mostly done. Unfortunately I determined that I had to remove the front shoe and swap it to the operator's side to make the shoe line up correctly. Whoops. 

Here is the fully assembled shoe from Dean - turned out I guess I got the wrong shaft measurement off the M19 and ordered the wrong size hole in the hangers. Whoops. Dad's drill press made quick fixing of my error. 

Eventually, finishing by lantern light, we got all four wheels assembled, and adjusted to provide braking in the first notch. 

http://www.mainememory.net/artifact/14504/enlarge
On MaineMemory.net - in the Oakfield Historical Society Collection. Dad is convinced that the Bangor and Aroostook M14 pictured is his car. #18. We've found bolt holes that match the location of the drink cup dispenser and his car does have the box for holding a lantern on the front. In addition, it does have the large tool boxes and holes where the wipers would have been. 

Dad has found one of the running boards to be bad - so he replaced it. Upon flopping the board over, we see these two half hinges:
Note the position of the steel covering up the brake rigging - it matches up with the location of the hinges on this piece of running board. 
Is the car pictured BAR 18? We may never know - but its a good guess!

More to come!

Thursday, May 29, 2014

Wiring up Dad's BAR 18 - Memorial Day - 5-26-14

As the work on BAR 62 starts to get more sporadic - Dad's car, BAR 18, has become the focus of some more work. Today, the chore was wiring up the ignition system. 
My initial reaction was to strip the wiring completely and start fresh, however the existing wiring was found to be relatively new, in good condition and usable. One thing neither Dad nor I liked was the location of the battery - near the fuel tank - making it very difficult to charge without removing it and very difficult to remove. We relocated the battery and the flat mount buzz coil I've mentioned earlier to a battery box mounted on the operator's side near the windscreen. This time, due to space, the battery box was mounted parallel to the car, unlike the 62. 
Here the box is mounted and the wiring is pretty much done - for the ignition at least.

Here is the previously installed cutoff switch, which I was able to reuse - note the newly installed toggle switch near it - this will be for the Head / tail lights. 

Here is the original ignition cutoff switch - still mounted - and re-used.

In addition to the conversion to a completely 12 volt system, I eliminated the positive ground on the timer and coil and ran a negative ground setup. Works fine as the coil buzzed as it should!
 More to come!

Monday, May 19, 2014

Progress and problems - 5-18-14

After the recent successful startup of the 62, and starting work on the 18, I figured my 'oh what the heck I'll fire the 62 up and give it another test run' wouldn't take too long. 
Best laid plans....
We swapped spark plugs and eventually got the car started.
I took the advice of someone on the RailroadMotorcarMaintenance group and jacked up the rear of the car to allow the belt to be tightened and the rear wheels to spin freely. It was during this that we noticed a problem - the crank side wheel is wobbling badly when it turns. We'll be addressing this soon. We suspect the axle has a tweak in it. 
On another note, this represents the first time that the 62 and 18 have been photographed together. 
After the test run, we tied up some more wiring, removed some old wiring clips that were in the way and generally made it more tidy. 


After the test run - both went back into the garage as we wait for future work..

More to come!

Sunday, May 18, 2014

The little details left - 5-14-14

With any project - there are little details to get it completed, this is one of them
Dad ordered some replacement air filters - K&N brand - so I can honestly say that my motorcar is K&N Equipped :-) With the top and bottom altered slightly to be compatible with the element - they are all installed. Thanks Dad!

More to come!

Saturday, May 17, 2014

In celebration of getting the #62 running..... 5-12-14

Literally minutes after we got the 62 fired up - I was helping Dad pull the roof of BAR 18, his M14 motorcar. 
Here is the 18 after the roof removal.

The next day, Dad had replaced the rivets that were missing from the roof

While giving the roof a once over, Dad found this written in pencil inside the roof. BAR X3403. 
Dad posted this picture on the Bangor and Aroostook Railroad Facebook Group. In response to this, group members Larry Curtis and Warren Cain put together that the BAR X3403 being a ballast car indicated that this car, BAR 18 was most likely the speeder assigned to the ballast gang. 

More come!

Friday, May 16, 2014

The Culmination of 5 months of effort! - 5-11-14

This was the day that it all came together. After months of effort - the 62 was rolled outside in one piece for the first time in a LONG while. The video says it all:

More to come!


Thursday, May 15, 2014

Hitches mounted and painted - 5-10-14

With his usual speed and quality....
Dad has gotten the primed rear hitch painted and mounted

Here is the front - It might look off center, but it is centered on the frame, not the engine. \

More to come!

Sunday, May 11, 2014

Getting Hitched Up - 5-9-14

Dad's skills extend far further than the paint and body work that this project has focused on. 
These are the two hitches Dad has designed, cut, drilled and had welded

This is the other side of the front hitch

And here they are both primed.

More to come!

Saturday, May 10, 2014

Sweeping Hitches... 5/8/14

Today Dad got busy with the Sweeps...
After being sandblasted, primed and painted

Here they are installed.

In addition, these new flaps were fabricated from some material Dad had. 

These are the cardboard patterns and the steel pieces cut from them for the front and rear hitches for towing and being towed. 

More to come!

Friday, May 9, 2014

The Sweeps Day - 5-5-14

With the major projects winding down - the 62 is looking better and better but the little projects are starting to take center stage. 
This morning Dad put on a new fuel line. This afternoon's project was the Sweepers:
Here they are torn apart

And here they are welded up and prepared for sandblasting, priming and paint. 
What isn't obvious is the amount of straightening Dad had to do to get them to look this good. 

With the big (and small) projects winding down, we're going get this car wired up, fired up and on the rail soon!
 More to come!

Thursday, May 8, 2014

Carb Cleanup - 5-4-14

We've done an awful lot of cosmetic restoration - but haven't really touched on the mechanics.. 
This day, Dad made a good call and decided to clean up the Carburetor, along with the air cleaner mount.  


In his own words: 
"I disassembled the entire carb and found it to be really pretty clean.
One of the compensating valves was stuck on its shaft, the other one
was free. After degreasing and blowing everything out,  the needle
valve was cleaned, everything was lubed up and reassembled. I was able
to reuse the original gaskets but I replaced the thin aluminum washers
with new copper ones.
Next was to de-grease the aluminum air cleaner holder and elbow. This is
a 2 part piece. The air cleaner is sandwiched between and it is made
of metal screening. I took the dimensions and K & N makes one that
will fit. I did a slight modification to the metal  top and bottom
covers to allow the new air filter to fit,  cleaned them up and
treated them for rust. I will prime and paint these two pieces. I will
pick up a new air cleaner and a new piece of rubber hose to make the
connection between the carb and the air cleaner. I cleaned up the
original hose clamps and will re-use these."

As a side note - if you look behind the air cleaner mount - just inside the firewall, you'll see the cleaned up timer installed and wired in. 

As usual - a HUGE thank you goes out to Dad for this one!
More to come!

Wednesday, May 7, 2014

The Brackets that you Might not see.... 5-3-14

Remember those brackets Dad whipped up? 
Look hard - you might not see it!

Little easier to see here...

And here they are mounted!

Nice work Dad!

Tuesday, May 6, 2014

Enlightened Brackets - 5-1-14

Today in Dad's custom fabrication shop - we see him working some miracles. With a piece of recycled metal reclaimed from an old display, Dad celebrated the first day of his official retirement.... by working. 
Inside rear view of the back light bracket

Rear bottom view....

And here the bracket is installed. Using the original roof support U bolts - you'll see the bracket fits perfectly. Nice work Dad!

This is the front brake / tail light bulb bracket as custom bent and drilled by Dad.

And here they are installed....

And a lights on Test....

And the lights off test.

After a brief discussion as to lighting location.....
They are now splitting the center line. 


Great Work Dad! 
Happy Retirement!

Monday, May 5, 2014

The Bracket is done! 4/28/14

Dad's painting magic strikes again - the bracket is done:
Painted to match - this will be where the flasher sits.

Nice work Dad!

More to come!

Sunday, May 4, 2014

Flasher bracket - 4/27/14

In any project with multiple people working on it - there will be disagreements on how the project should be executed. One of these disagreements between Dad and I was simply how to mount some of the new lighting onto the car. This car did not have any lighting - certainly not strobe lights. Dad has been maintaining that the way to affix the magnetic mounted strobe lights was to rivet a piece of steel onto the roof. I have been maintaining that this is unnecessary and would involve not only punching holes into the roof, but altering the originality of the car. Up until now, everything that has been done to alter the original appearance or function of the car could be removed - as it was all bolted in or paint. I saw no reason to alter this approach. Fortunately Dad decided I had a point and worked up this bracket for the strobe light on the front of the roof:

Looks like a bent key hole shape....

But once we extend the bolts being used for the rear view mirror bracket...

This will allow the strobe to be mounted right on the front and once painted - will hardly be visible. 

More to come!